
How We Shot ‘The Trolley Problem’ Short Film on iPhone
An inside look at how we utilised iPhone and creative camera setups to capture our latest short film.
Written by Kirk Mihelakos | May 29, 2025
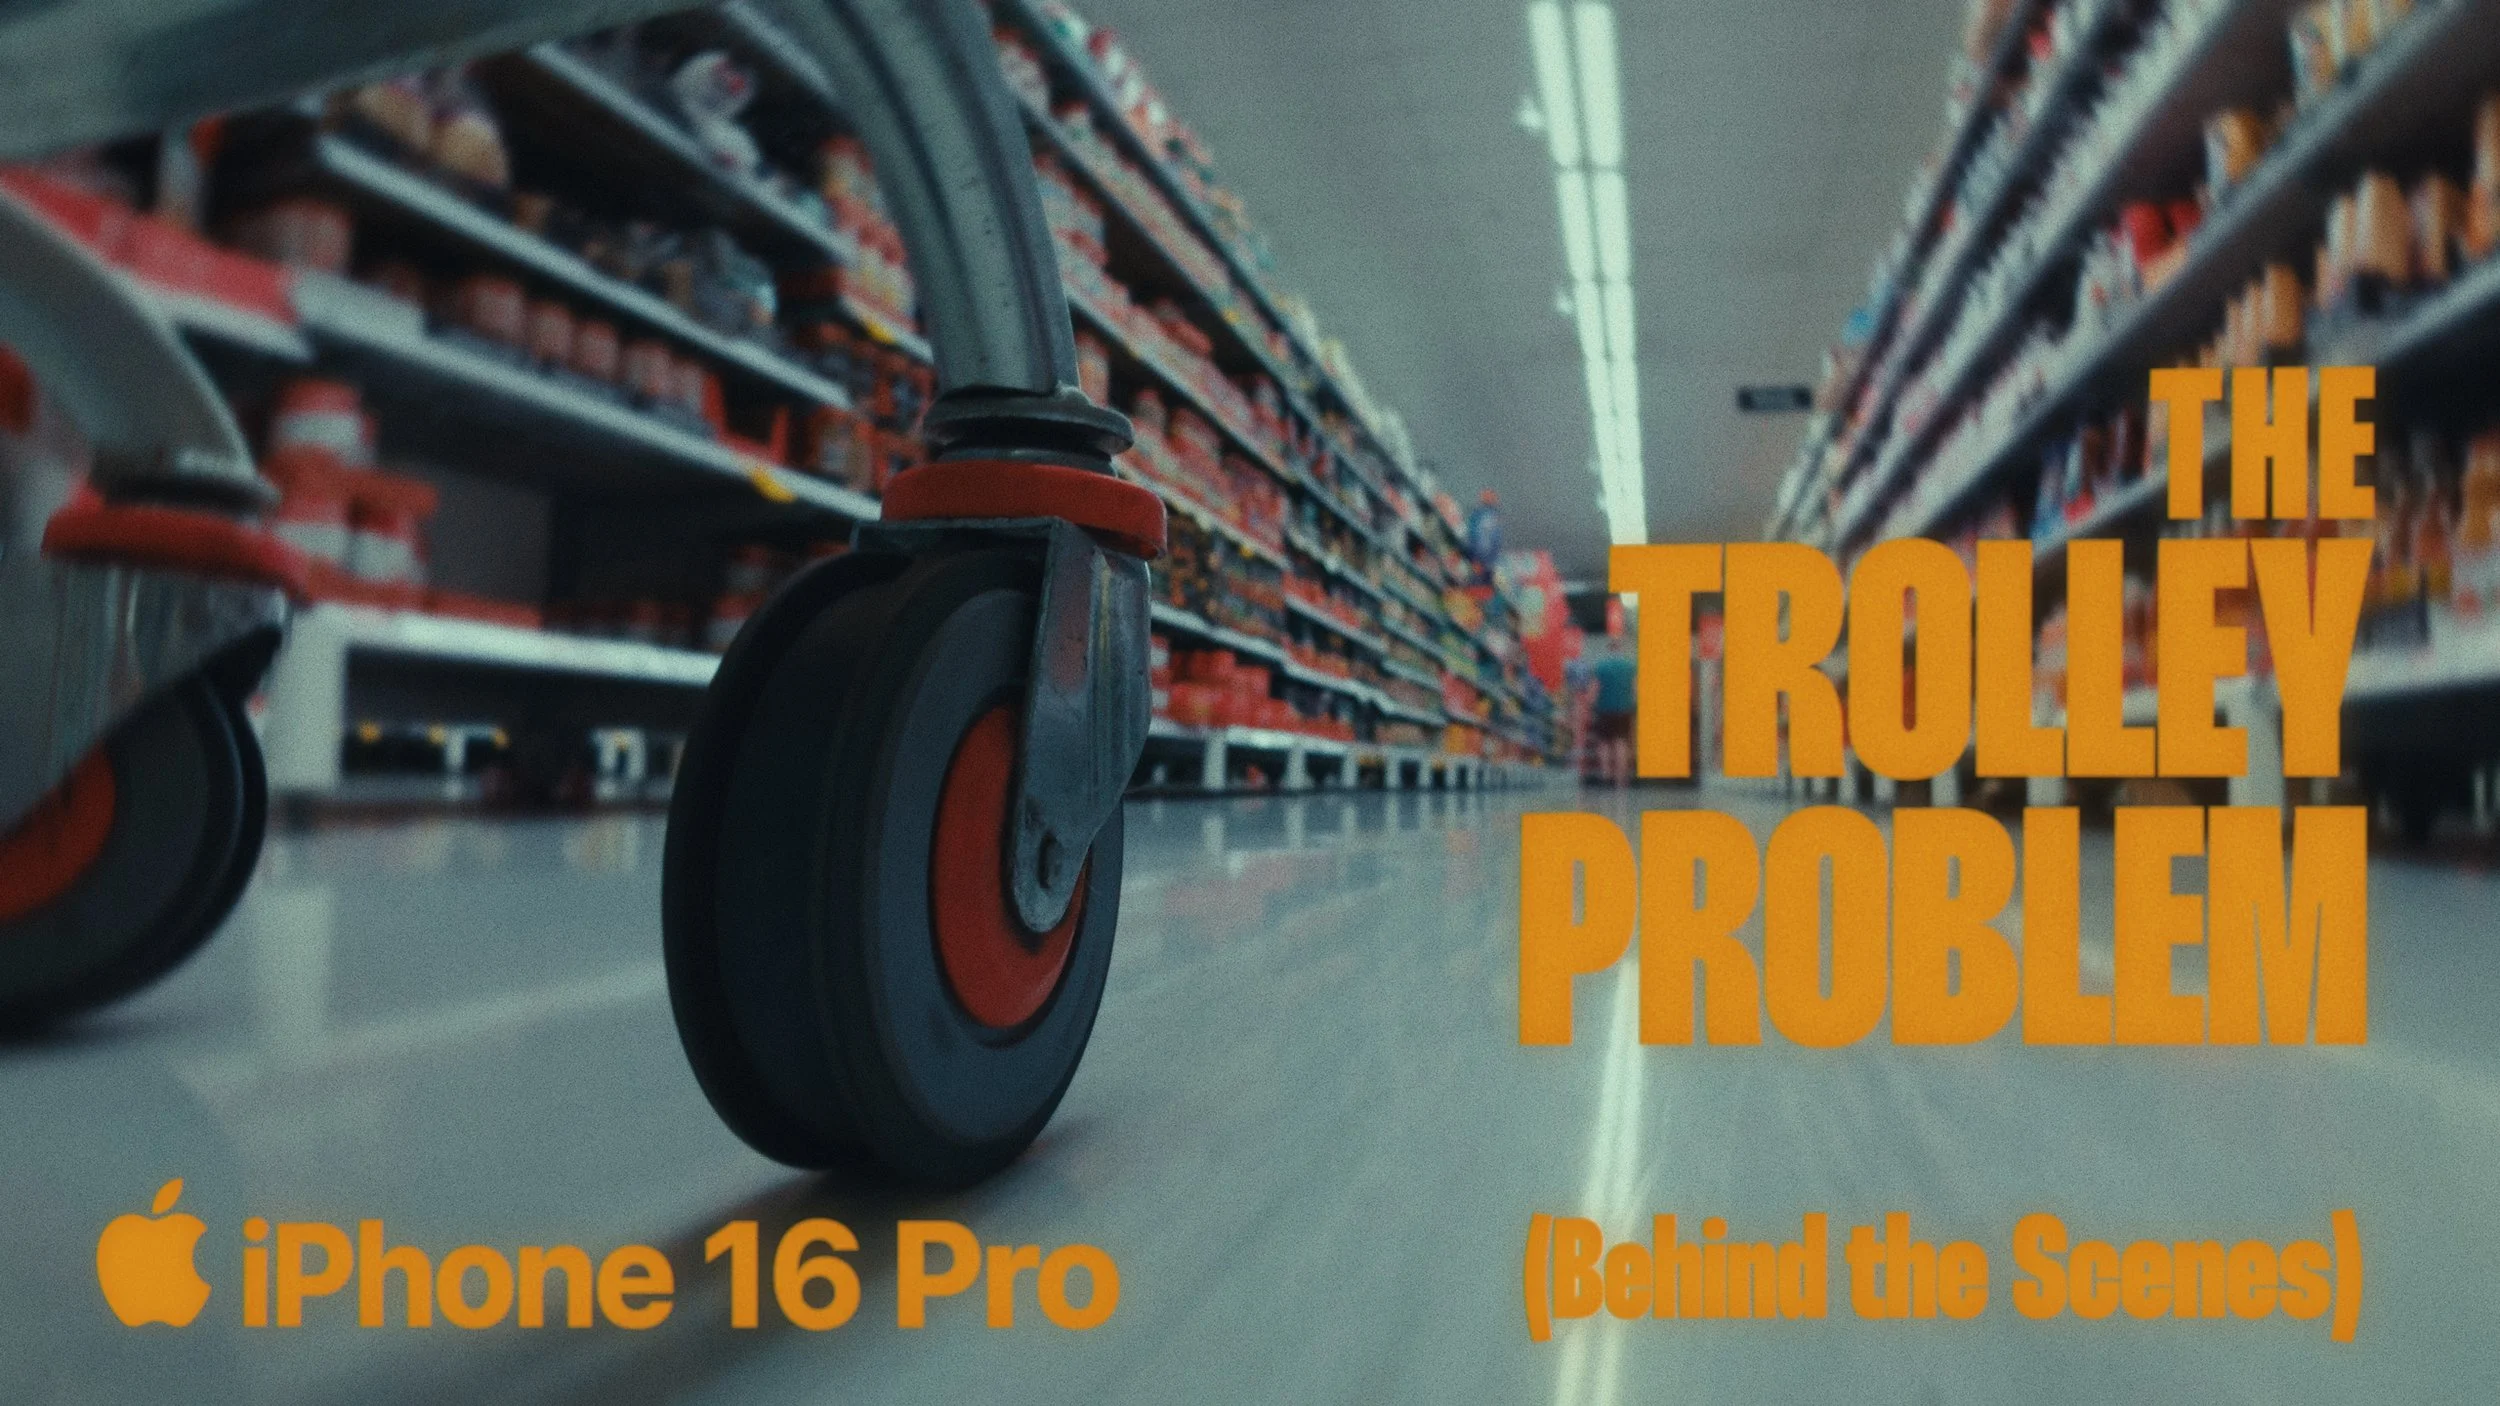
The iPhone 16 Pro is an incredibly versatile filmmakers camera, which we used to shoot the entirety of ‘The Trolley Problem’ short film.
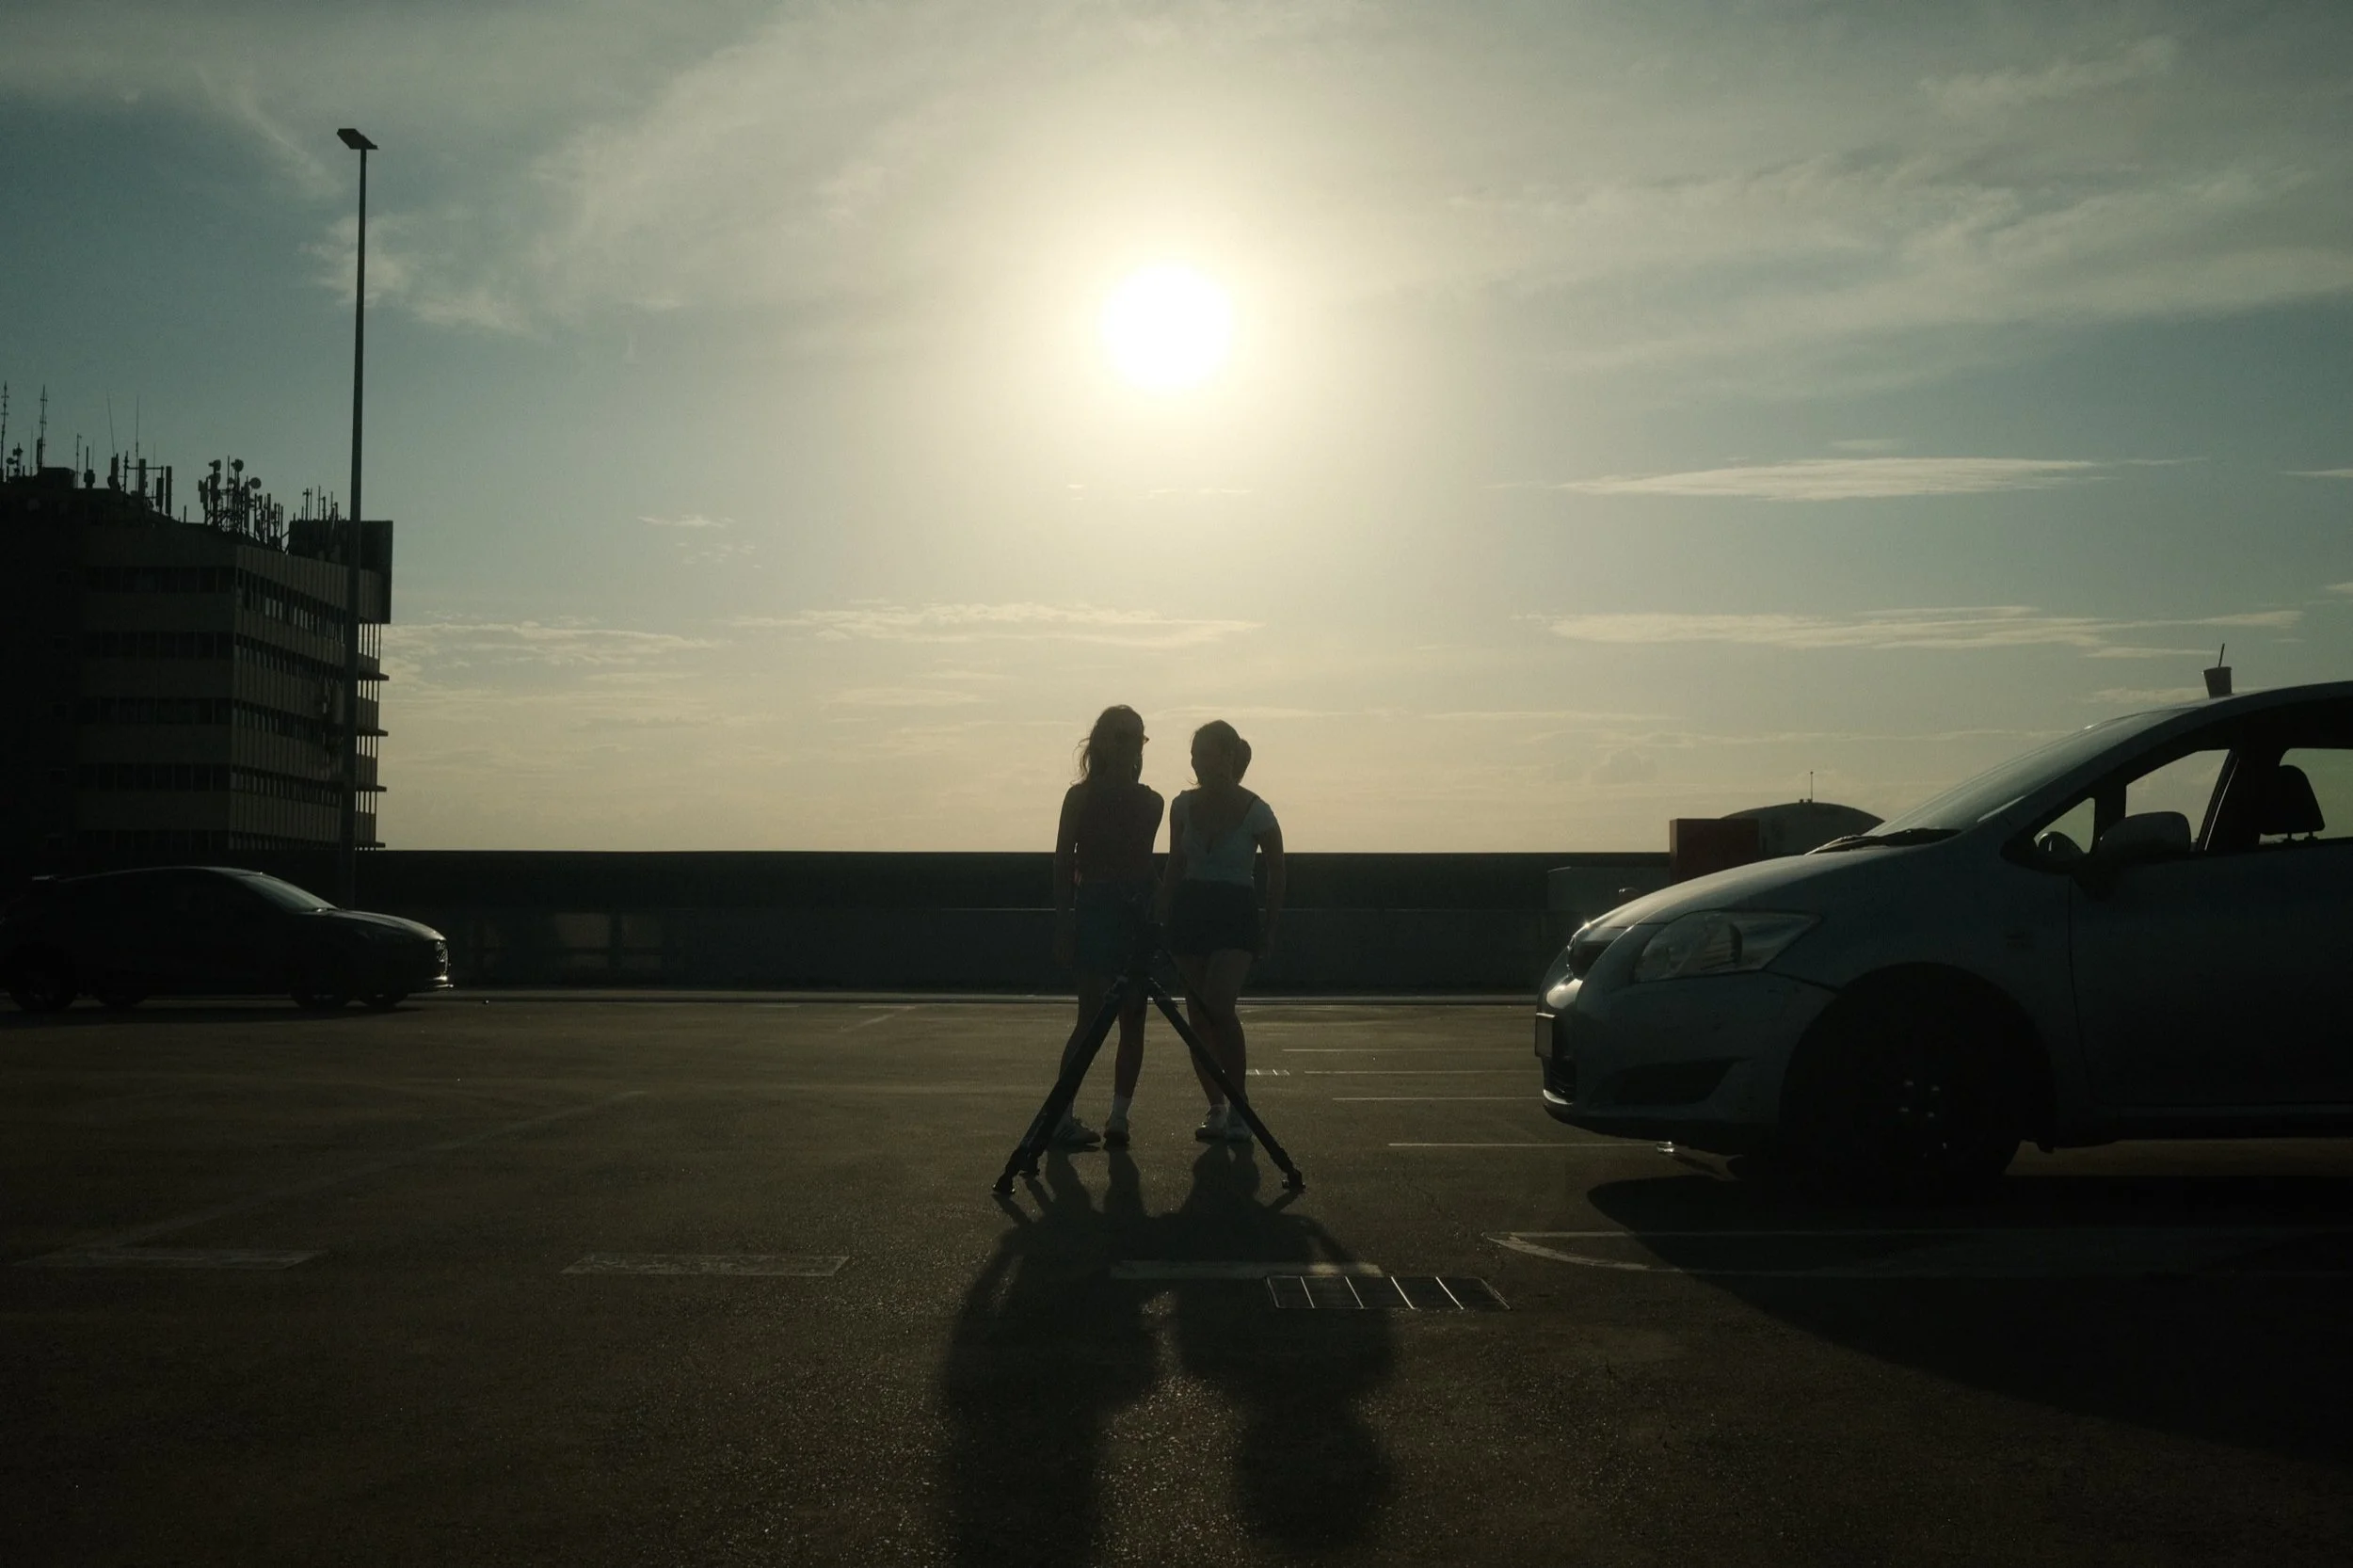
Short filmmaking is an incredible amount of fun. Quick timelines, small budgets, but big ideas and great crews, bring together some of the best filmmaking moments I’ve experienced in the last couple of years. Recently I was approached by indie short-film director Ali Wells (Dare You to Remember), to capture a short film around the idea of a trip to a grocery store, and the mundane movements of shopping with a trolley.
“I love short filmmaking for the storytelling, collaboration and memory-making.”
“I’ve been visiting a particular car park for years, and the deserted trolley bays have always stood out to me. It feels like a silent test of character, will you do the right thing and return the trolley, or leave it stranded? This sparked the initial idea for the short. I sent Kirk a rough concept and storyboard with the very serious title, ‘The Trolley Problem’.” — Ali Wells
There is a FAQ at the end of this article for commonly asked questions that have been sourced from Reddit, IG and YouTube Comments. Most have been covered in depth through this article too.
Director Ali Wells (Right) and Actress Eva Hatzicostas (Left) on the set of The Trolley Problem.
Given the brief of the short-film having a lot storyboards with POV shots and mounting a camera to a trolley (a often very unpredictable and not-so rigid shopping cart), it was clear a small, nimble, yet high quality setup would have to be used here. After some previous work with it, I turned to my iPhone 16 Pro and it’s Apple Log recording capabilities alongside the ProRes HQ codec, to capture the whole short film on.

Rigging the iPhone 16 Pro to the trolley.
The Gear and Setup
Alongside the iPhone (16 Pro Dessert Titanium 512GB), we utilised the Blackmagic Design Camera App on iOS for manual camera control and monitoring. A Sandmarc 58mm Telephoto Lens (with their included iPhone case), plus the Sandmarc 18mm Wide-Angle Lens for all the POV and mounted shots. On the lens we added the Sandmarc Variable ND filter, an essential as we were filming in bright daylight, and shooting at 1/48 at 24FPS to maintain our 180-degree shutter angle rule.
For the camera nerds out there, here is a summary of the settings we utilised:
ISO 54 - 500
24FPS
Shutter Speed 1/48(s)
ND Filter 2 - 6 stops
ProRes HQ
Apple Log
Recorded in the Blackmagic Camera App
White Balance at 4700k
Shot at 4K (3840 x 2160) exported at (3240 x 2160 [1.5:1] aspect ratio)
Additionally but not necessary, we attached a Lexar Go 1TB SSD to the camera for recording. Although to keep the rig lightweight, particularly during some of the trolley shots, we recorded straight to the iPhone internal storage, selecting a folder on the Blackmagic camera app. I’ll note that recording in ProRes HQ Apple Log is quite taxiing on storage, the entire project took up about 500GB of internal space. In future, shooting in another ProRes format like 422 or even LT, can still achieve good quality results, so long as you record in Apple Log for the colour profile for post-production grading flexibility.

The Blackmagic Camera App paired with the Sandmarc lenses turns a simple iPhone into such a powerful filmmaking setup.
Camera Rigging
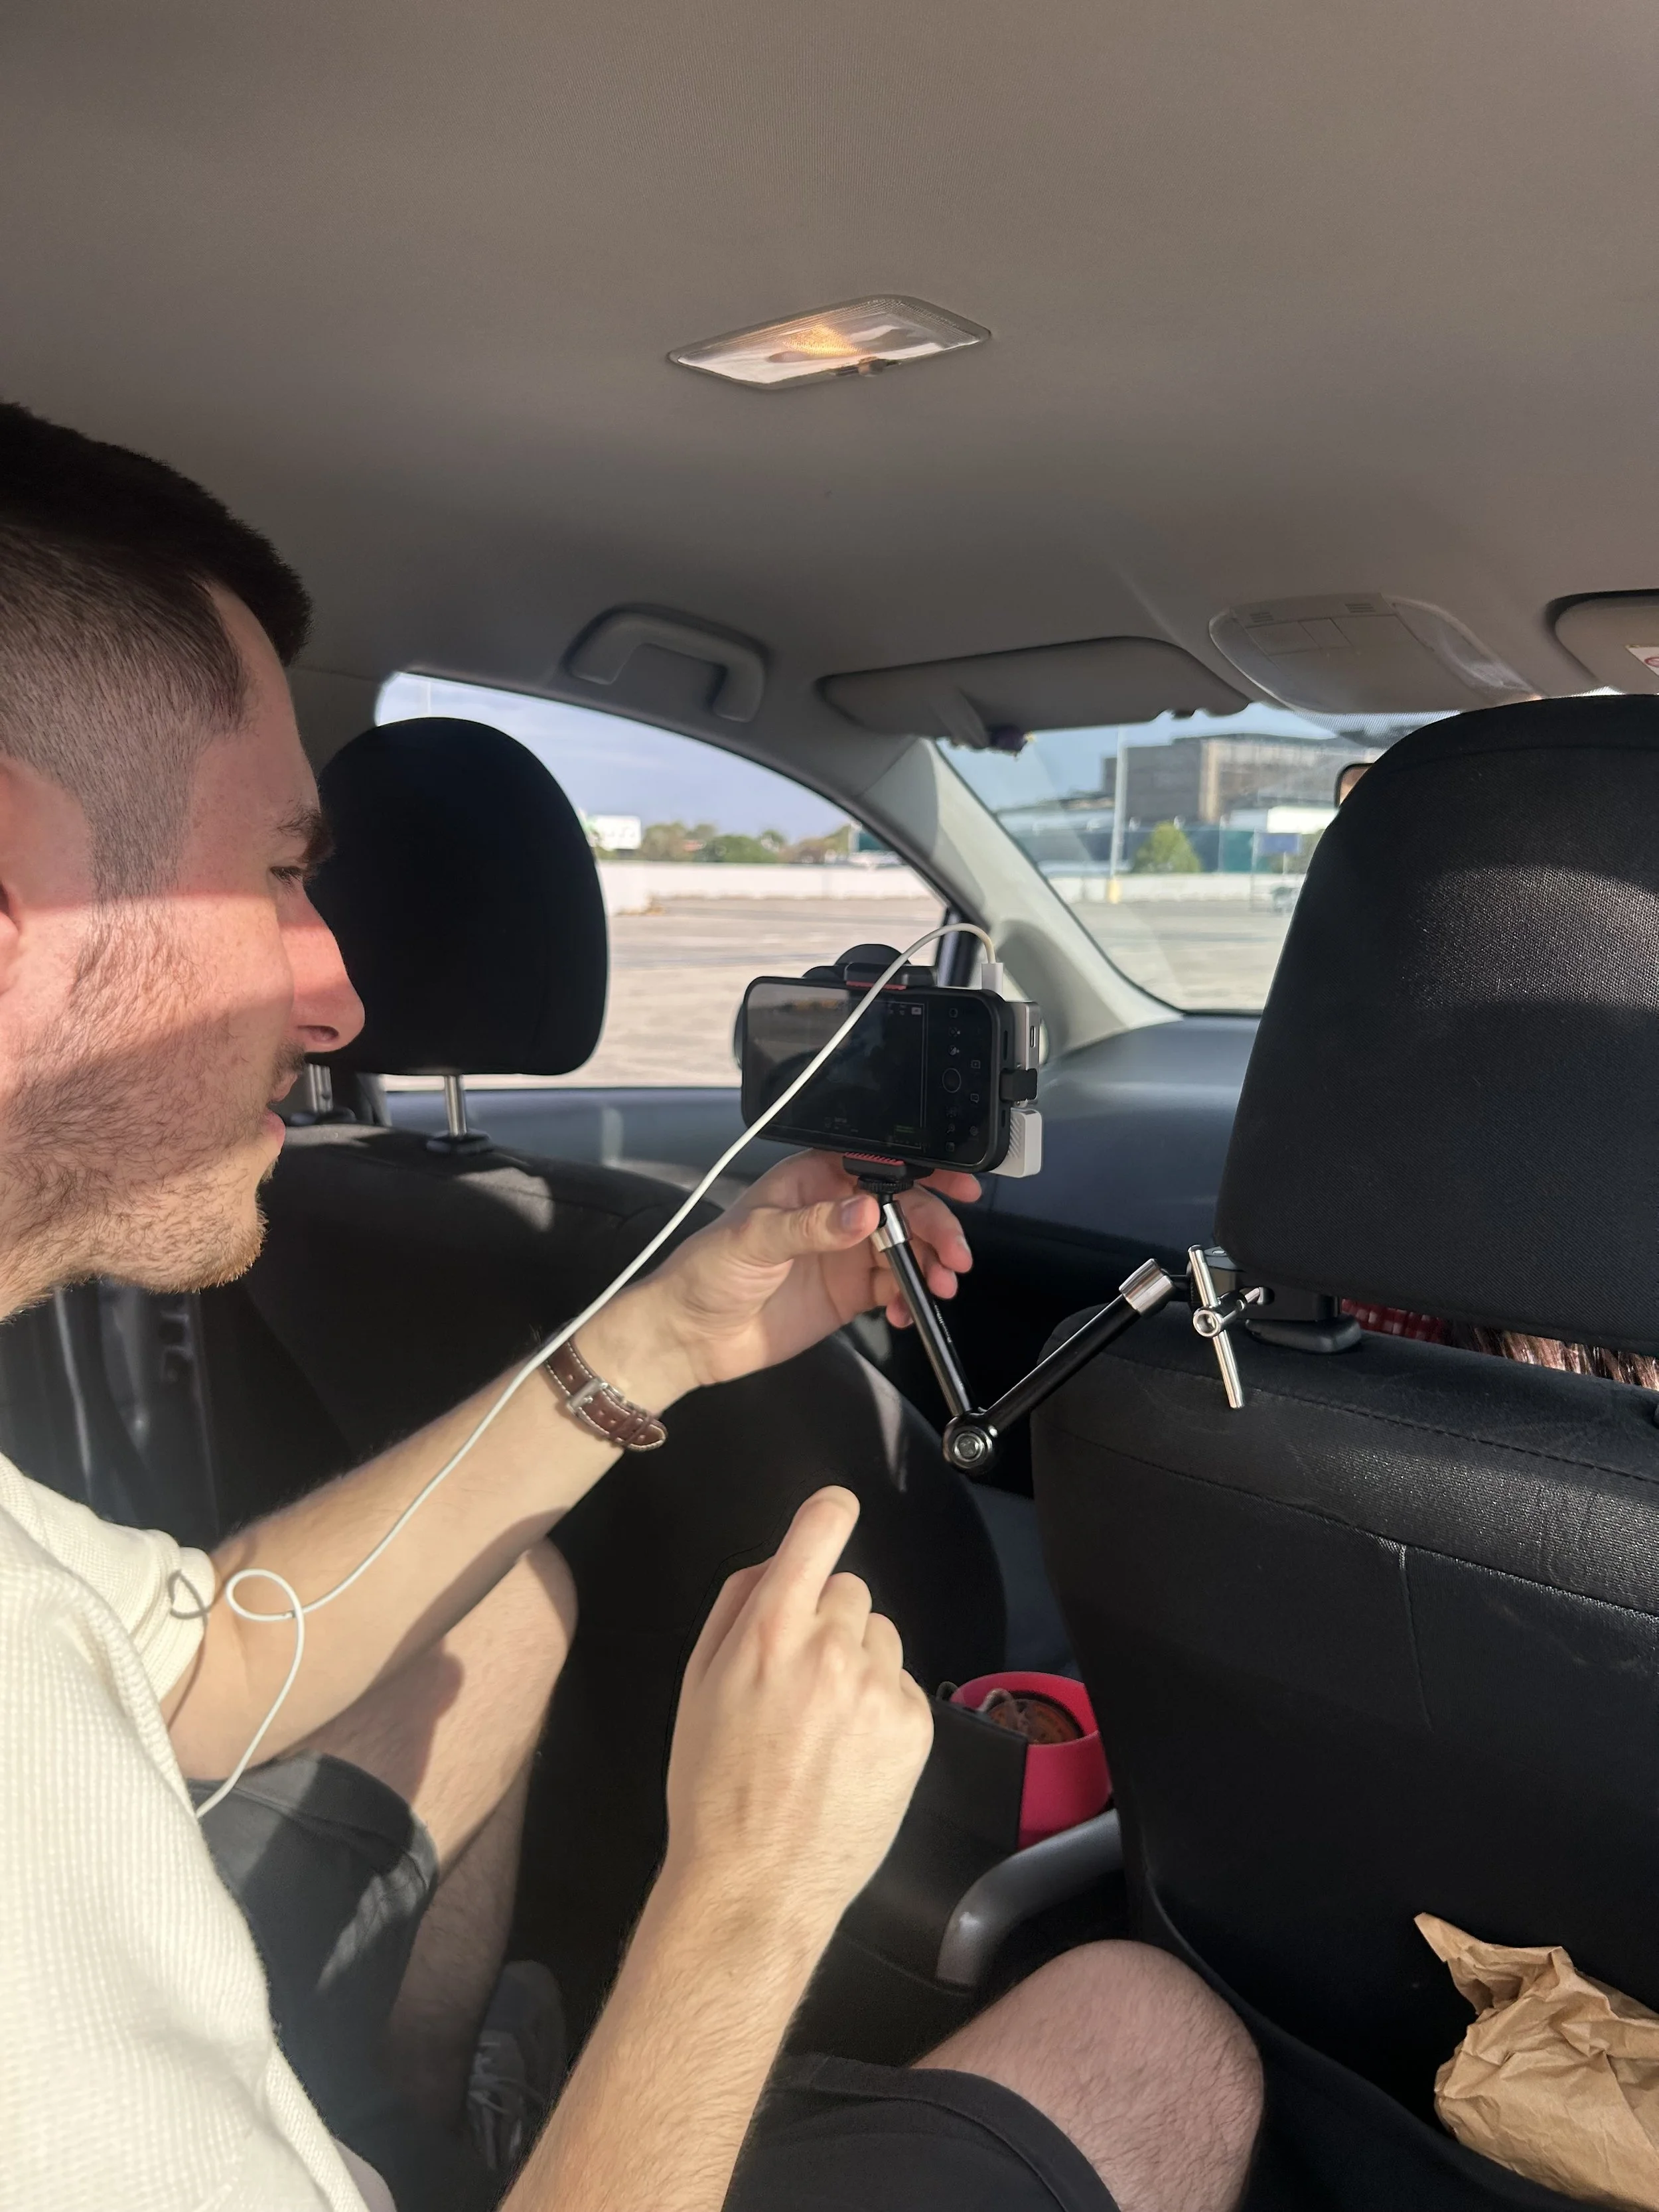
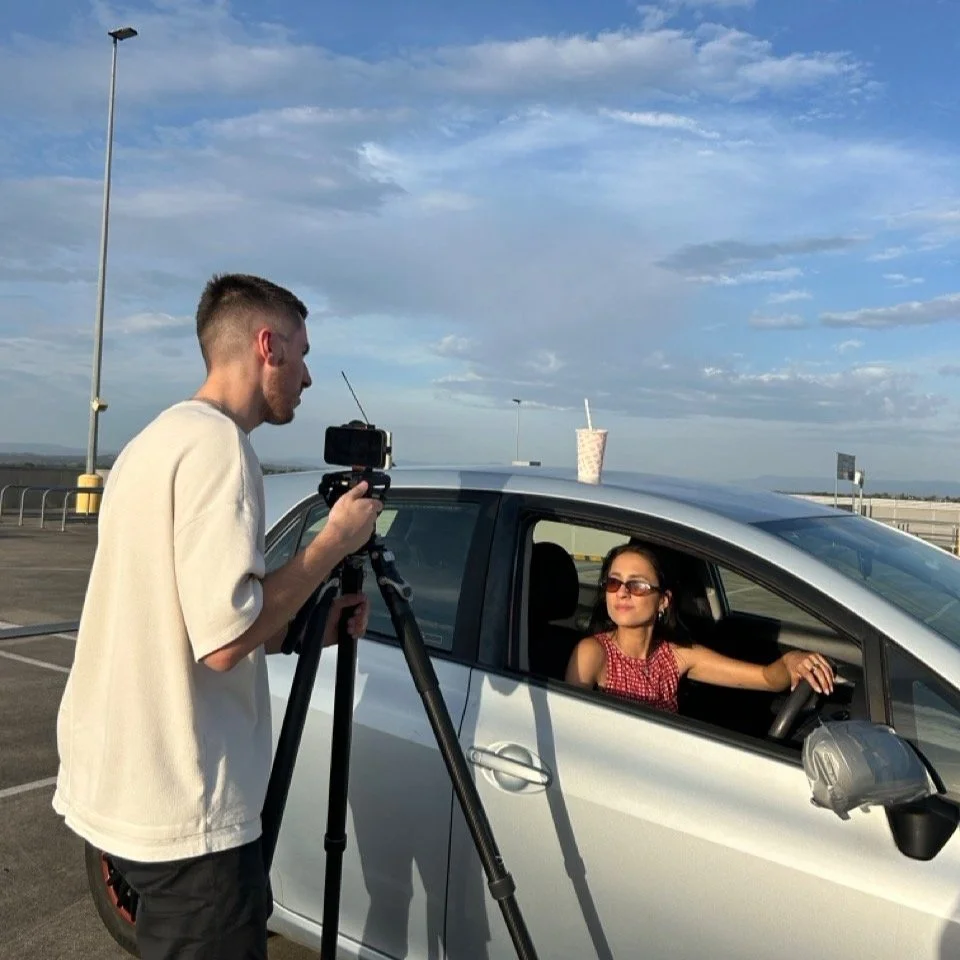
In terms of rigging, we attached the iPhone to a Manfrotto universal smartphone clamp mount, which had a 1/4” thread screw at the base of the mount. This attached to a SmallRig Magic Arm for our trolley rigged shots, or a tripod (the YC Onion Pineta Peak tripod), for the locked off shots.
iPhone Rigging Setup
Magic Arms are incredible! We used them with to mount the phone to the trolley and the car interior.
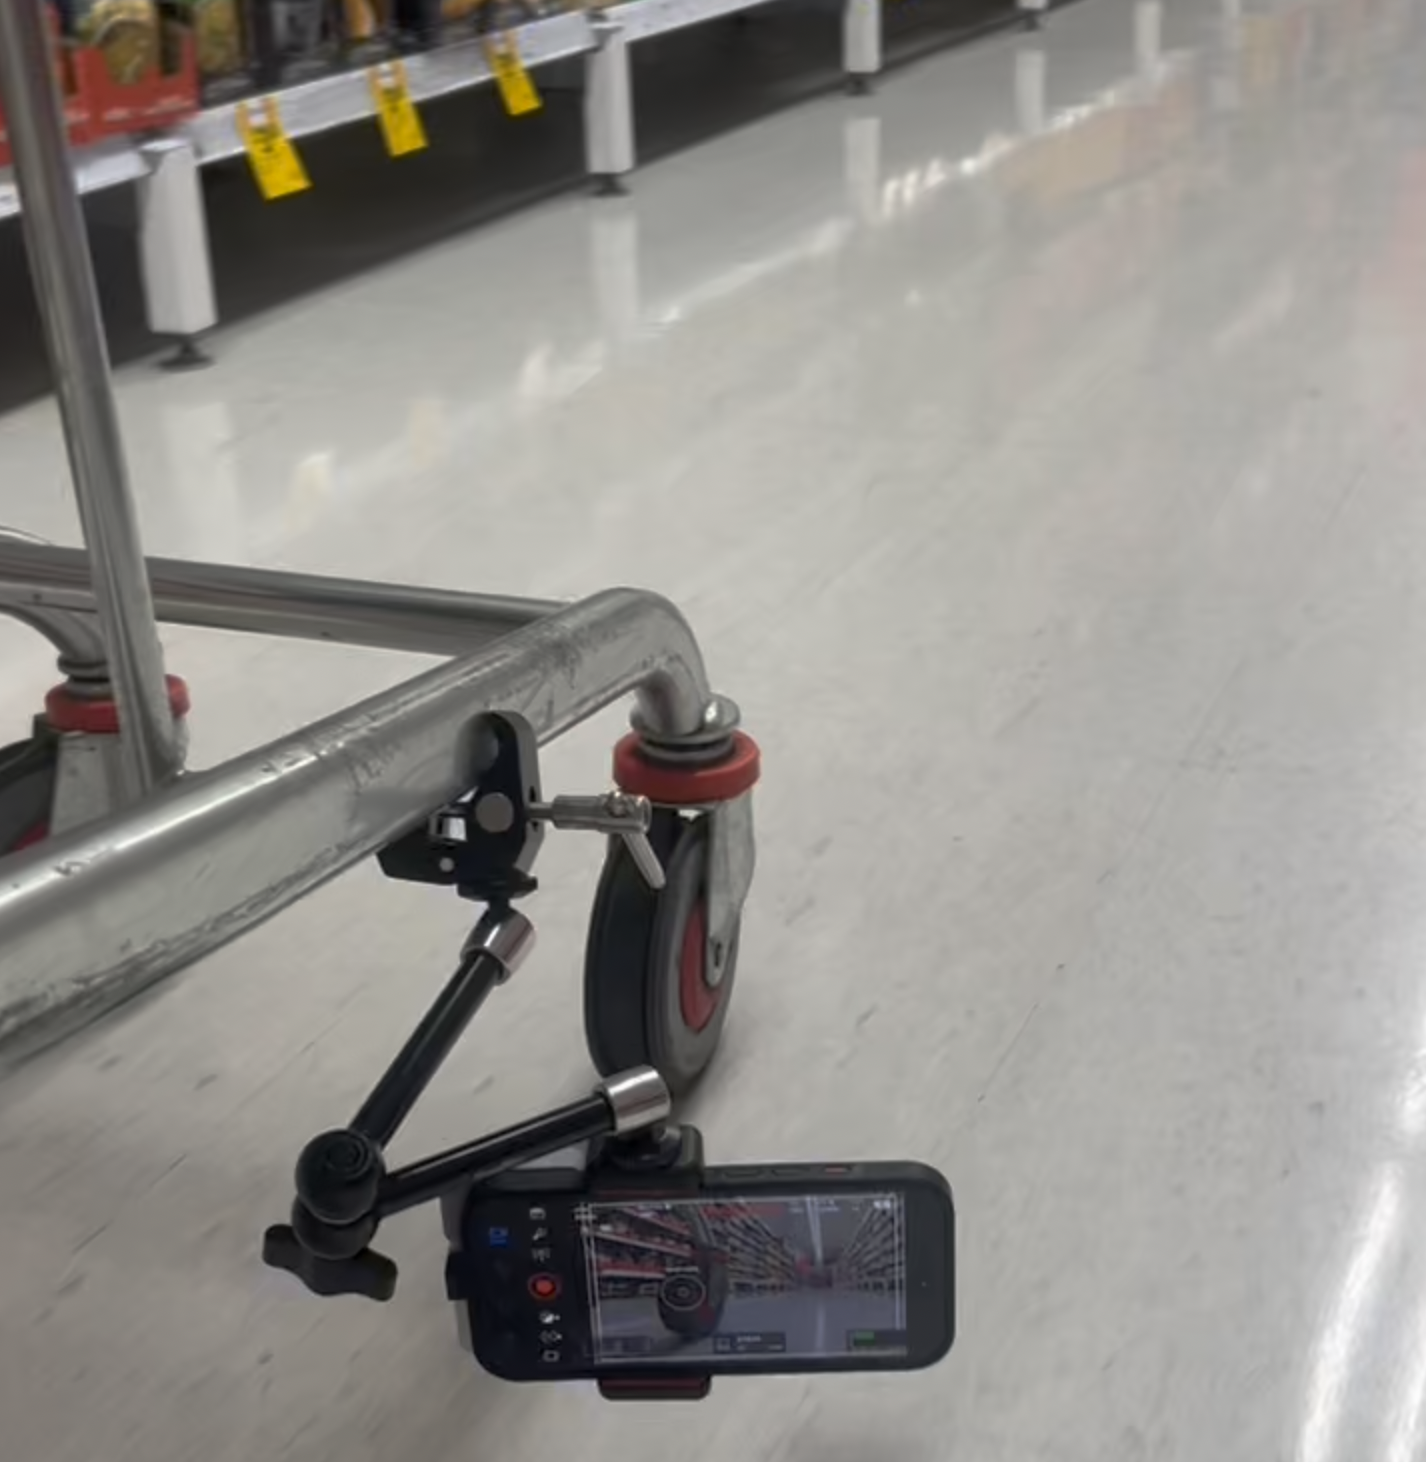
The iPhone 16 Pro attached to the trolley utilising the magic arm from SmallRig and Manfrotto smartphone clamp.
Lighting
This is pretty short and straight-forward. We didn’t setup any lighting rigs at all, only had a bounce board (gold faced) to reflect light from the sun and that was about it. All natural light, including the sequences in the market. Considerations were made on shooting positioning, ensuring our subject and objects were backlit as much as possible, whilst shooting on the shadow side as often as we can.
Post-Production: Edit, Sound and Color Grading
In terms of post-production which included, editing, sound design and color grading, everything was completed in Davinci Resolve 19. The edit being quite linear and straightforward, with the use of plenty of fusion generated titles for the ‘film-emulation’ graphics and credits you see on screen.
Plenty of post-production stabilisation was also applied using Davinci Resolve built-in perspective stabilisation (applying strength conservatively was the key here to not over-do it) alongside some translation stabilisation too for some of the more tricky bumpy shots.
One unique element to the color grading process I applied on this short, was the use of magic masks and radial blurs, to mask-out subjects and apply a circular ‘Petzval / Helios lens’ style blur to the background, achieving a swirly bokeh affect. Reminiscent of those aforementioned vintage lenses.
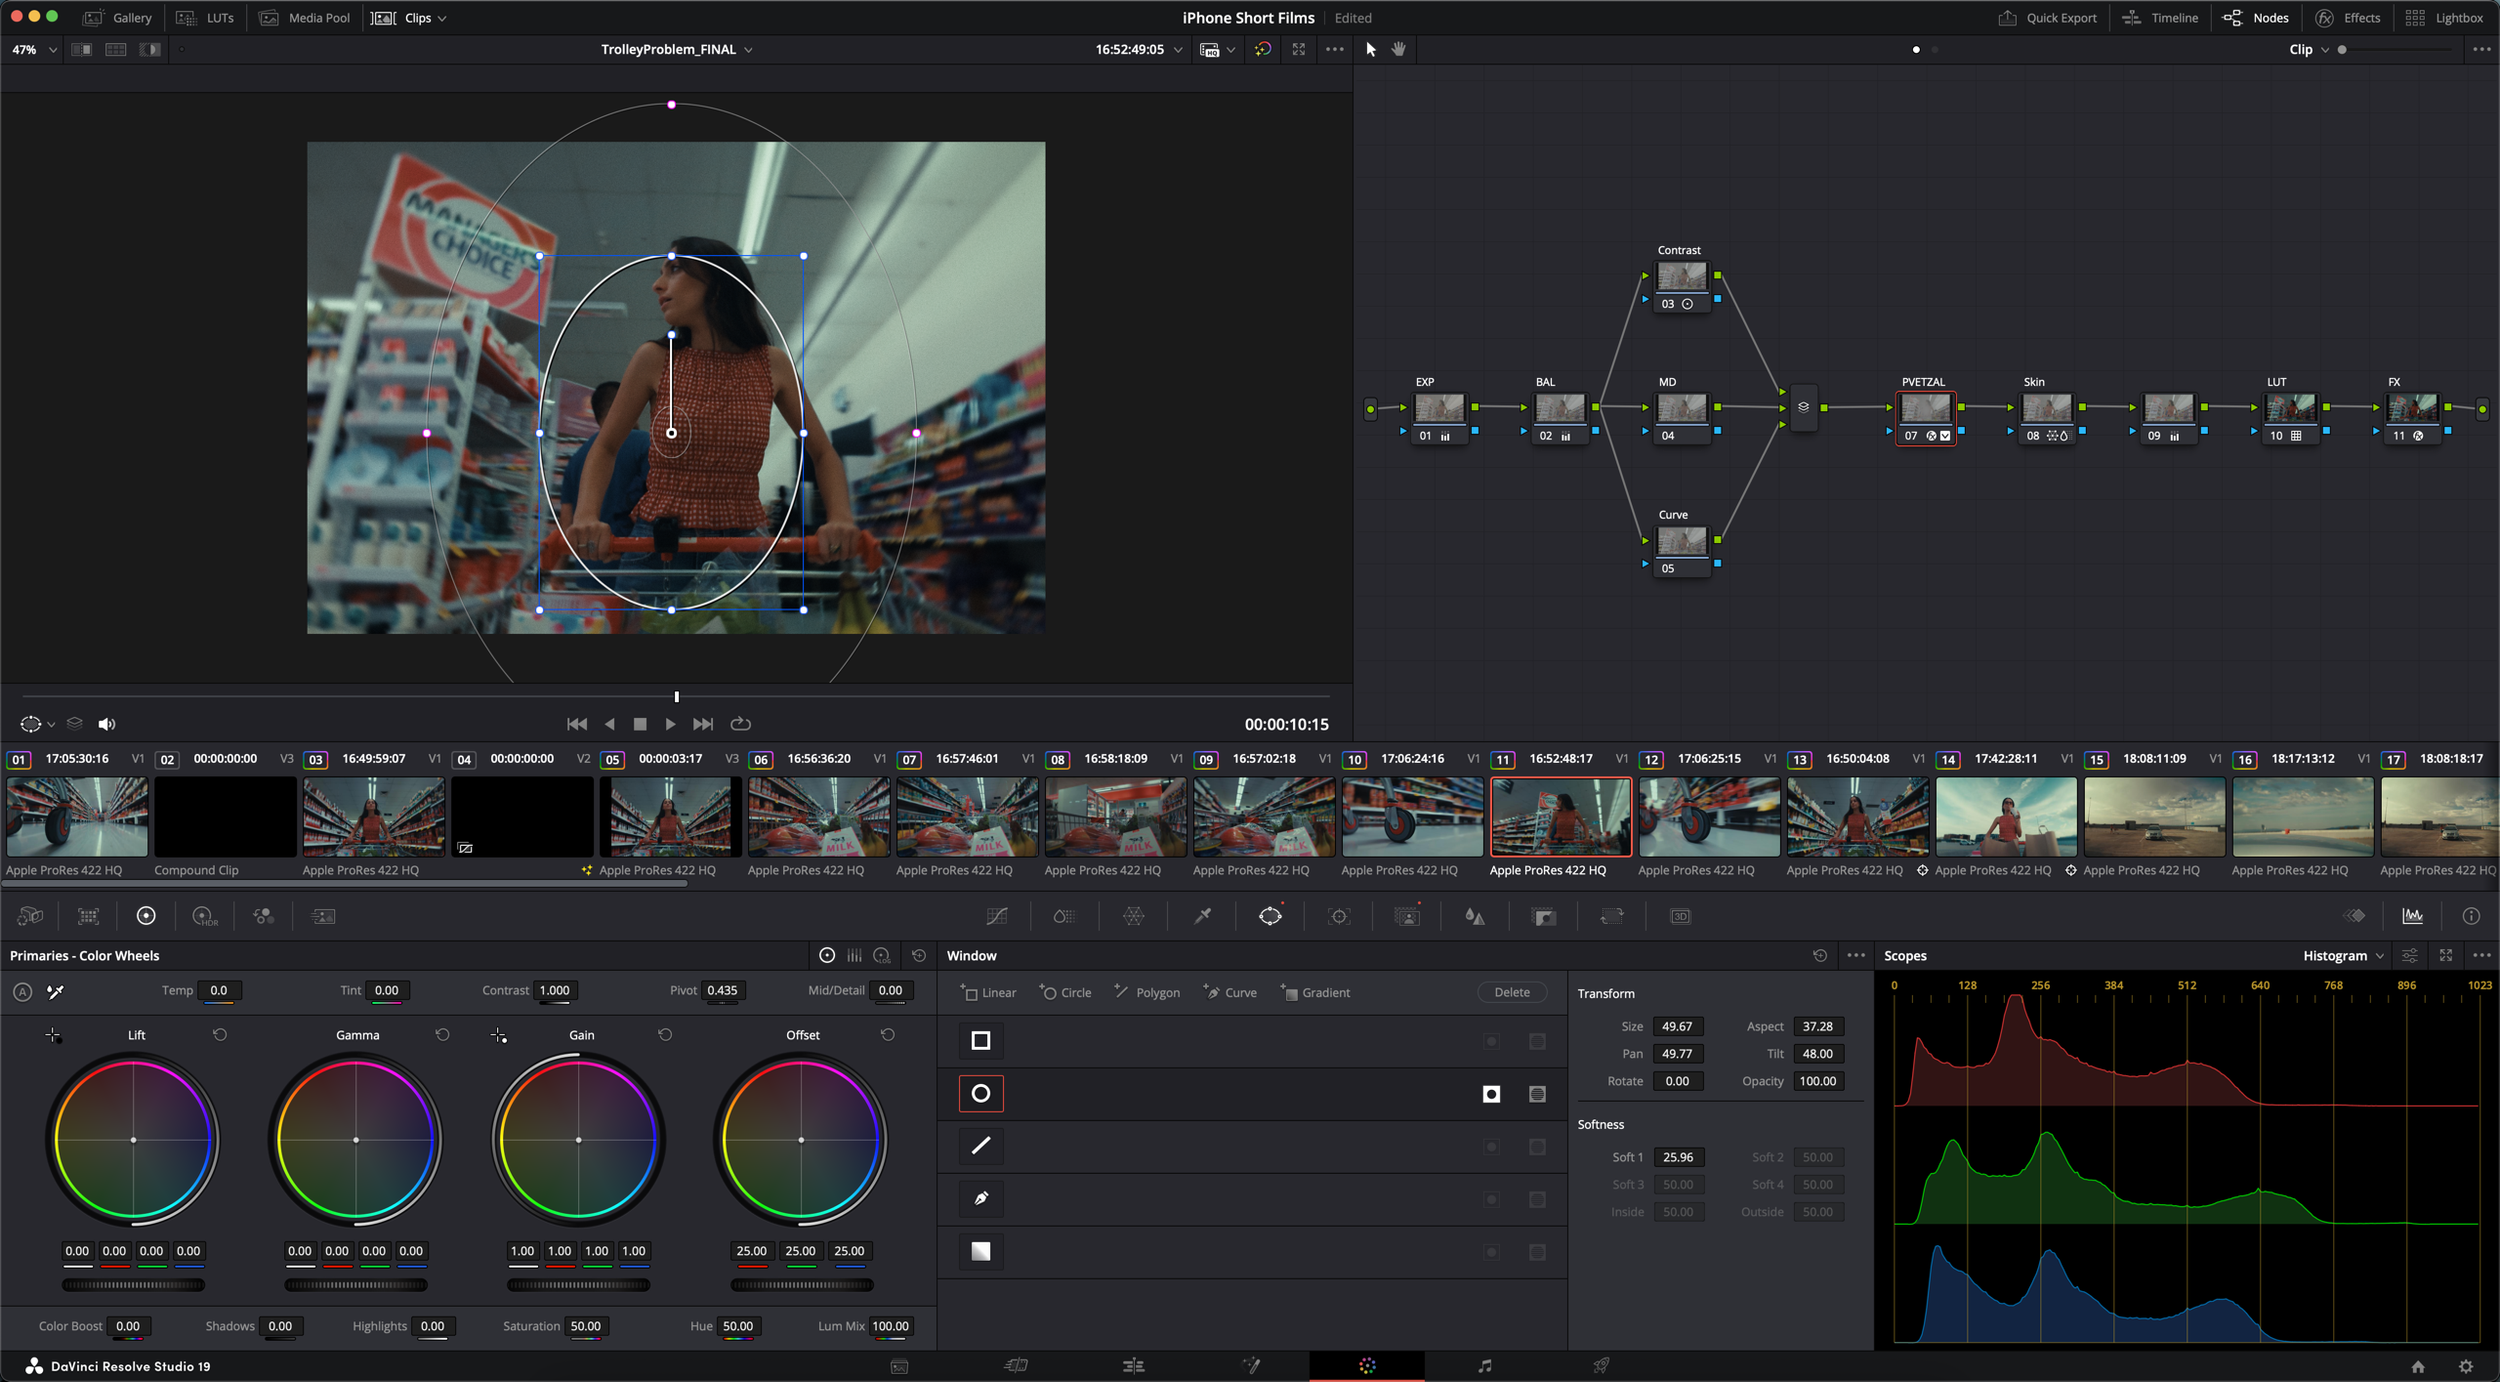
The Color page in Davinci Resolve 19 for Trolley Problem. I like to keep a simple node structure, with the most complex part being the Petzval look for the swirly bokeh, achieved with power-grades, magic mask and radial blur.
Aside from that my color-grading process remained quite similar, where I base my looks starting with my iPhone Apple Log lut, and take it from there. Also special shoutout to the new Davinci Resolve 19 ‘Film Look Creator’ feature, which works wonders when applying film grain, halation and those last touches.
A lot of the color grade was based around my Apple Log LUT which you can find here. Also includes a few variations and Davinci Resolve power-grades I utilise.
Additionally, one major thing I want to mention that (hopefully) didn’t go noticed, was that we did not record a single-sound on set, using the internal iPhone Mics or external mics. Main reasons being was that it was just far too windy on location, the supermarket we shot in was also noisy and we wanted to keep the camera rig as small as possible. All sound-design you’re hearing was generated by sourcing sound effects from either Artlist or Soundly (my favourite SFX tool for Davinci Resolve due to their drag and drop features), with a few in-built effects used in Resolves fairlight tab.
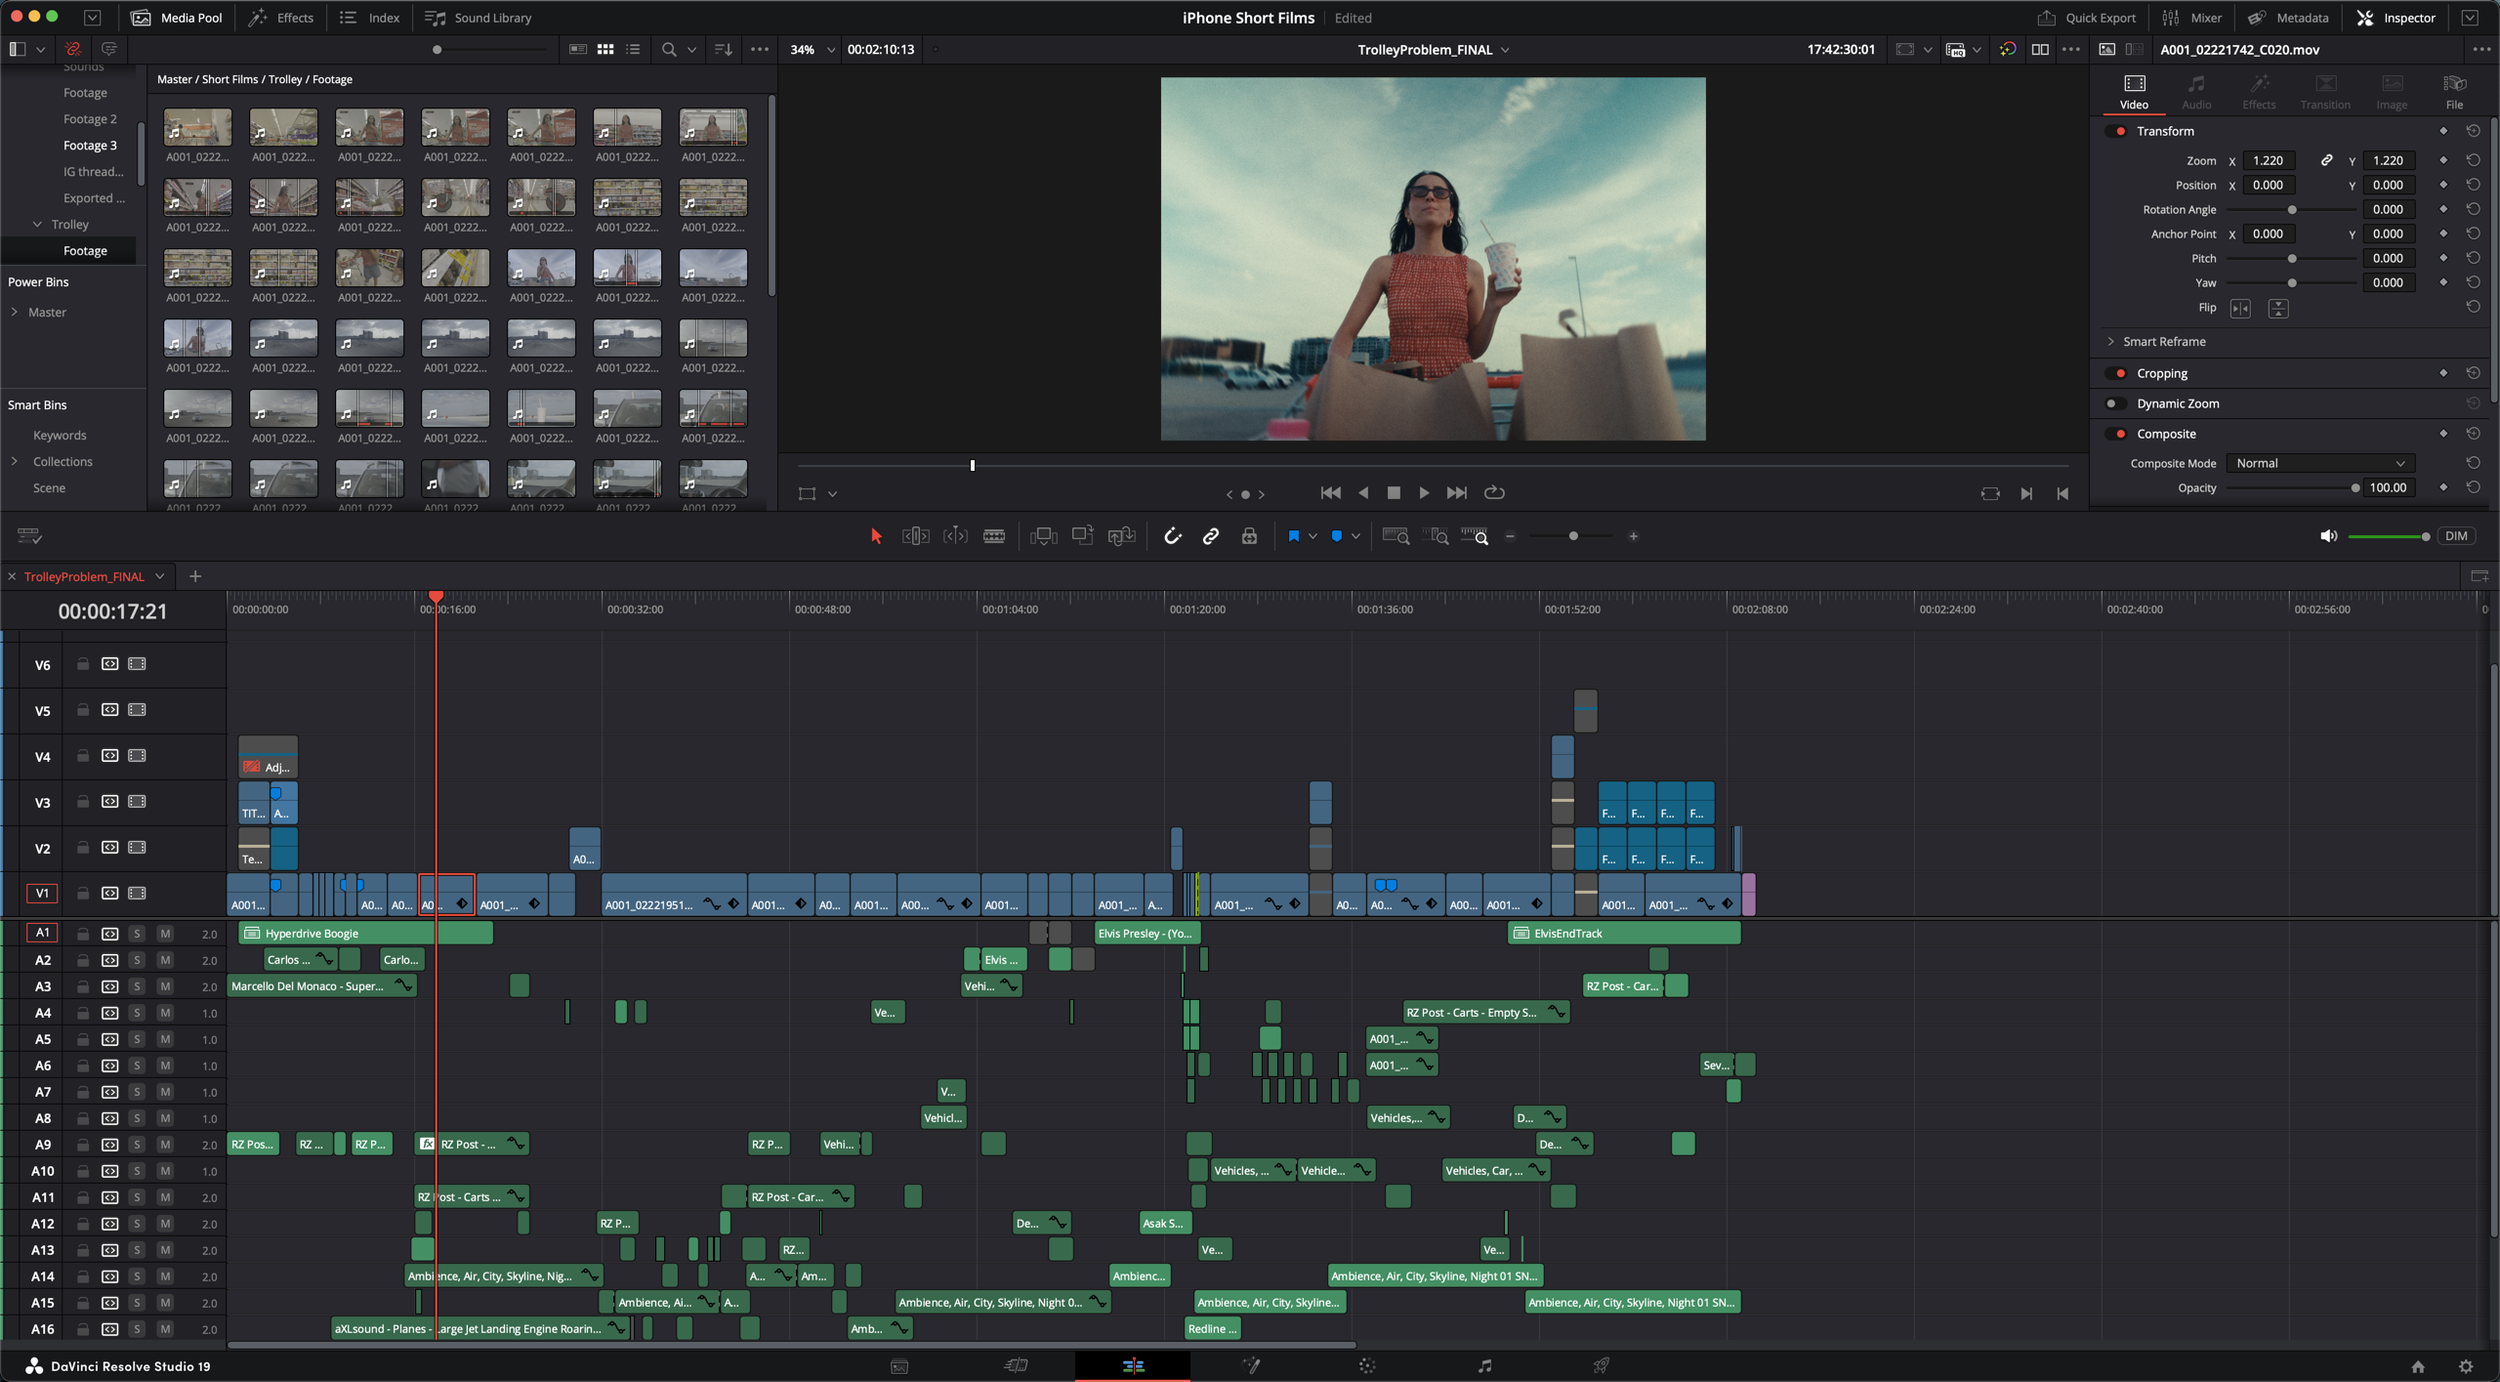
A simple timeline, backed with a lot of post-sound to build the shorts sound stage from scratch.
Furthermore, here is a gear list with links to purchase if you’d like to try out any of the gear yourself.
Gear List (with Links)
iPhone 16 Pro 512GB
Sandmarc iPhone Case (Included when a Lens is Purchased)
Hopefully you enjoyed this breakdown. If you have any questions feel free to contact me using the links in the header or footer, or message me anywhere on socials (@KirkMihelakos).
Cheers!
— Kirk
The iPhone rig on-top of the YC Onion Pineta Peak Tripod for all the locked off shots.
Frequently Asked Questions (FAQ)
-
iPhone 16 Pro (512GB) Model. Utilsiing the Blackmagic camera app. Shot in Apple Log using ProRes for the codec.
-
Davinci Resolve 19.
-
I applied a Magic Mask and power window (depending on the shot) to the foreground subject, to mask it OUT, of a radial blur effect applied. A free, included effect available inside of Davinci Resolve 19.
-
Using SmallRig Magic Arms and the Manfrotto universal smartphone camera mount attachment.
-
I follow a pretty standard process for all of my iPhone footage grades. Shoot in Apple Log in ProRes for maximum color fidelity, and dynamic range + Bit-depth. Bring it into resolve, apply my Apple Log conversion LUT first, and work from there. I have a Powergrade template that I use in resolve to speed up the workflow too, which includes Davinci Resolves Film Look Creator.
-
It’s such a small versatile camera, that requires minimal crew and setup time. Allowing us to focus on what matters, filmmaking, storytelling, and just having fun doing it all.
-
Sandmarc Lenses (Wide and Telephoto), and an ND filter were the main accessories. The rest are detailed above in the gear section that was used on set.
-
All natural light was used in this shoot. No additional lights were brought in. One bounce board was used to reflect sunlight onto the talent in the vehicle.
-
100%. Yes.
Film Links
High Quality 4K ProRes Upload:
Worth watching below on Vimeo if you want to get an idea of the quality of the image coming straight from the camera in ProRes uncompressed. (Huge difference compared to the YouTube upload).
Review on Letterboxd
YouTube Upload:
Support the channel and watch the film here! Be sure to come say hi and drop a comment too and all the other subscribey stuff YouTubers typically ask for.
Some links may be affiliate activated which help us shoot more short films!